今、自分の中でORMツールとしてアツいのがprismaです。
Prisma | Instant Postgres plus an ORM for simpler db workflows
モデル定義もマイグレーションも、ドキュメント読んだり実装してみたりすればするほどかなり使える書き方ができるので、すごく可能性を感じています。
そんなprismaですが、python用のクライアントがあるということで、勉強がてら触ってみたいと思います。
pythonプロジェクトの初期化
まずはpoetryでプロジェクトを初期化します。
poetry new prisma-client-python-playground
作成されたプロジェクトに依存性を追加します。
poetry add -D prisma
さて、これでいつものprisma CLIが使えるようになりました。
早速Prismaの初期化をしていきましょう。
今回もsqliteを使用していきます。
% poetry run prisma init --datasource-provider sqlite

✔ Your Prisma schema was created at prisma/schema.prisma
  You can now open it in your favorite editor.

Next steps:
1. Set the DATABASE_URL in the .env file to point to your existing database. If your database has no tables yet, read https://pris.ly/d/getting-started
2. Run prisma db pull to turn your database schema into a Prisma schema.
3. Run prisma generate to generate the Prisma Client. You can then start querying your database.

More information in our documentation:
https://pris.ly/d/getting-started
初期化できました。
初期化するとprisma/schema.prismaが作成されています。
// This is your Prisma schema file,
// learn more about it in the docs: https://pris.ly/d/prisma-schema

generator client {
  provider = "prisma-client-js"
}

datasource db {
  provider = "sqlite"
  url      = env("DATABASE_URL")
}
generator clientがjsクライアントになっているので、pythonクライアントに置き換えます。
generator client {
  provider             = "prisma-client-py"
  interface            = "asyncio"
}
マイグレーションの実行
モデルはPrismaのクイックスタートから追加しました。
model User {
  id    Int     @id @default(autoincrement())
  email String  @unique
  name  String?
  posts Post[]
}

model Post {
  id        Int     @id @default(autoincrement())
  title     String
  content   String?
  published Boolean @default(false)
  author    User    @relation(fields: [authorId], references: [id])
  authorId  Int
}
この状態でマイグレーションを実行してみます。
% poetry run prisma migrate dev --name "init"
Environment variables loaded from .env
Prisma schema loaded from prisma/schema.prisma
Datasource "db": SQLite database "dev.db" at "file:./dev.db"

SQLite database dev.db created at file:./dev.db

Applying migration `20230814005333_init`

The following migration(s) have been created and applied from new schema changes:

migrations/
  └─ 20230814005333_init/
    └─ migration.sql

Your database is now in sync with your schema.

Running generate... - Prisma Client Python (v0.9.1)

Some types are disabled by default due to being incompatible with Mypy, it is highly recommended
to use Pyright instead and configure Prisma Python to use recursive types. To re-enable certain types:

generator client {
  provider             = "prisma-client-py"
  recursive_type_depth = -1
}

If you need to use Mypy, you can also disable this message by explicitly setting the default value:

generator client {
  provider             = "prisma-client-py"
  recursive_type_depth = 5
}

For more information see: https://prisma-client-py.readthedocs.io/en/stable/reference/limitations/#default-type-limitations

✔ Generated Prisma Client Python (v0.9.1) to ./.venv/lib/python3.8/site-packages/prisma in 342ms
実行できました。
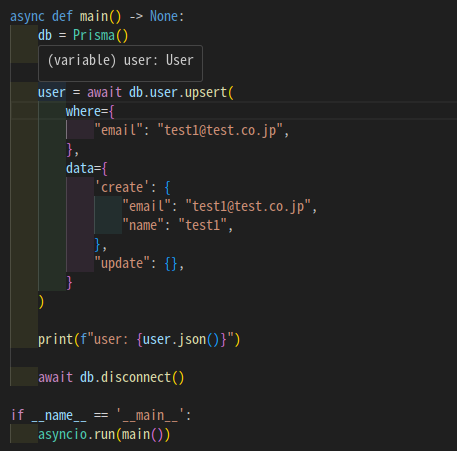
同時にPrismaクライアントも使えるようになったので、試しに実装してみます。
# main.py
import asyncio
from prisma import Prisma

async def main() -> None:
    db = Prisma()
    await db.connect()

    user = await db.user.upsert(**{
        "where": {
            "email": "test1@test.co.jp",
        },
        "data": {
            'create': {
                "email": "test1@test.co.jp",
                "name": "test1",
            },
            "update": {},
        }
    })

    print(f"user: {user.json()}")

    await db.disconnect()

if __name__ == '__main__':
    asyncio.run(main())
実行します。
% python main.py
user: {"id": 1, "email": "test1@test.co.jp", "name": "test1", "posts": null}
作成されたようです。
sqliteの方も確認してみます。
% sqlite3 prisma/dev.db
SQLite version 3.37.2 2022-01-06 13:25:41
Enter ".help" for usage hints.
sqlite> select * from User;
1|test1@test.co.jp|test1
レコードが作成されています!
マイグレーションの実行手順はJSのPrismaと扱いは変わらないですね。
Pyrightの導入
ドキュメント読んでると面白いことに、このprisma-client-pythonのメンテナーがpyrightのメンテナもやっているということが書かれていました。
I am the maintainer of the pyright PyPI package which is a wrapper over the official version which is maintained by microsoft
和訳:私は、マイクロソフトが管理する公式バージョンのラッパーである pyright PyPI パッケージの管理者です。
ということで、せっかくなのでPyrightを導入します。
といってもVSCodeを使っているならpylanceをインストールしてればいいです。
For most VS Code users, we recommend using the Pylance extension rather than Pyright.
ほとんどの VS Code ユーザーには、Pyright ではなく Pylance 拡張機能を使用することをお勧めします。
拡張機能をインストールしておけば、楽に型チェックをしてくれます。

jsクライアントとの併用
このままjsクライアントの生成を行うgeneratorセクションを追加したらどうなるでしょうか?
generator client_js {
  provider = "prisma-client-js"
}
この状態でクライアントを作成してみましょう。
% poetry run prisma generate
Environment variables loaded from .env
Prisma schema loaded from prisma/schema.prisma

✔ Generated Prisma Client Python (v0.9.1) to ./.venv/lib/python3.8/site-packages/prisma in 330ms

✔ Generated Prisma Client (4.15.0 | library) to ./node_modules/@prisma/client in 118ms
You can now start using Prisma Client in your code. Reference: https://pris.ly/d/client
実行できました。
再度ディレクトリを見てみると、以下のファイルが作成されています。
node_modulespackage.jsonpackage-lock.json
node_modulesには例のごとくprisma関連のモジュールがインストールされていました。
% tree -a -L 1 node_modules
node_modules
├── .bin
├── .package-lock.json
├── .prisma
├── @prisma
└── prisma
package.jsonもprismaの依存関係が既に実装された内容で書かれています。
{
  "name": "my-prisma-project",
  "version": "1.0.0",
  "description": "",
  "main": "index.js",
  "scripts": {
    "test": "echo \"Error: no test specified\" && exit 1"
  },
  "keywords": [],
  "author": "",
  "license": "ISC",
  "devDependencies": {
    "prisma": "^4.15.0"
  },
  "dependencies": {
    "@prisma/client": "^4.15.0"
  }
}
ただ現時点でprismaは5.1.0が最新なので、バージョンがちょっと古い…
と思ったんですが、バージョンに関してはPRISMA_VERSIONという設定で指定可能になるようです。
Configuration - Prisma Client Python
jsクライアントはこのまま使えそうですが、ここにgeneratorを追加しても果たしてちゃんと動くでしょうか…?
dbml用のジェネレーターを追加します。
npm i -D prisma-dbml-generator
schema.prismaにジェネレータを追加します。
generator dbml {
  provider = "prisma-dbml-generator"
}
この状態で再度prisma generateしてみます。
% poetry run prisma generate
Environment variables loaded from .env
Prisma schema loaded from prisma/schema.prisma
Error: Generator "prisma-dbml-generator" failed:

/bin/sh: 1: prisma-dbml-generator: not found
おっと、エラーになりました。
やはり普通にやるとエラーになるようですね。
ドキュメントを漁ると以下のような記述がありました。
Prisma Client Python exposes a CLI interface which wraps the Prisma CLI. This works by downloading a Node binary, if you don’t already have Node installed on your machine, installing the CLI with npm and running the CLI using Node.
The CLI interface is the exact same as the standard Prisma CLI with some additional commands.
和訳:Prisma Client Python は、Prisma CLI をラップする CLI インターフェイスを公開します。これは、マシンにまだ Node がインストールされていない場合は、Node バイナリをダウンロードし、npm を使用して CLI をインストールし、Node を使用して CLI を実行することで機能します。
CLI インターフェイスは標準の Prisma CLI とまったく同じですが、いくつかの追加コマンドがあります。
ある程度はよしなにやってくれるみたいですが、うまいこと連携する方法は軽く調べた感じよくわかりませんでした。
教えてつよいひと!!!!
まとめ
pythonからPrismaの操作ができました。
もう少しわからなかった部分の深堀りをしたいな〜と思いましたが、時間がないのでまた今度。。